body posture

Why Paddles Should Double as Hats

I know you’ve all jumped in the pool and thought to yourselves, “Gee, how can I use my training gear in a way it wasn’t made for?” And by that I mean I doubt anyone has ever had that thought, and this is the very reason why I question my husband’s sanity at times. But, since he thinks outside the pool (see what I did there? or maybe I should have said “outside the SwimBox,” take the one you like better and re-read this last sentence. Go on, I’ll wait) and plays around with these things, I now present to you my all time favorite drill. Paddlehead.

I love this drill because you DO NOT NEED a coach to practice it. Yes, you heard me correctly. The paddle gives you all the feedback you need to know if you’re doing the drill properly or not. And what does the drill work on? Head position.

SwimBox Swimming Lessons SwimBox Swim Coach Northern Virginia SwimBox Swim Team SwimBox Swim School

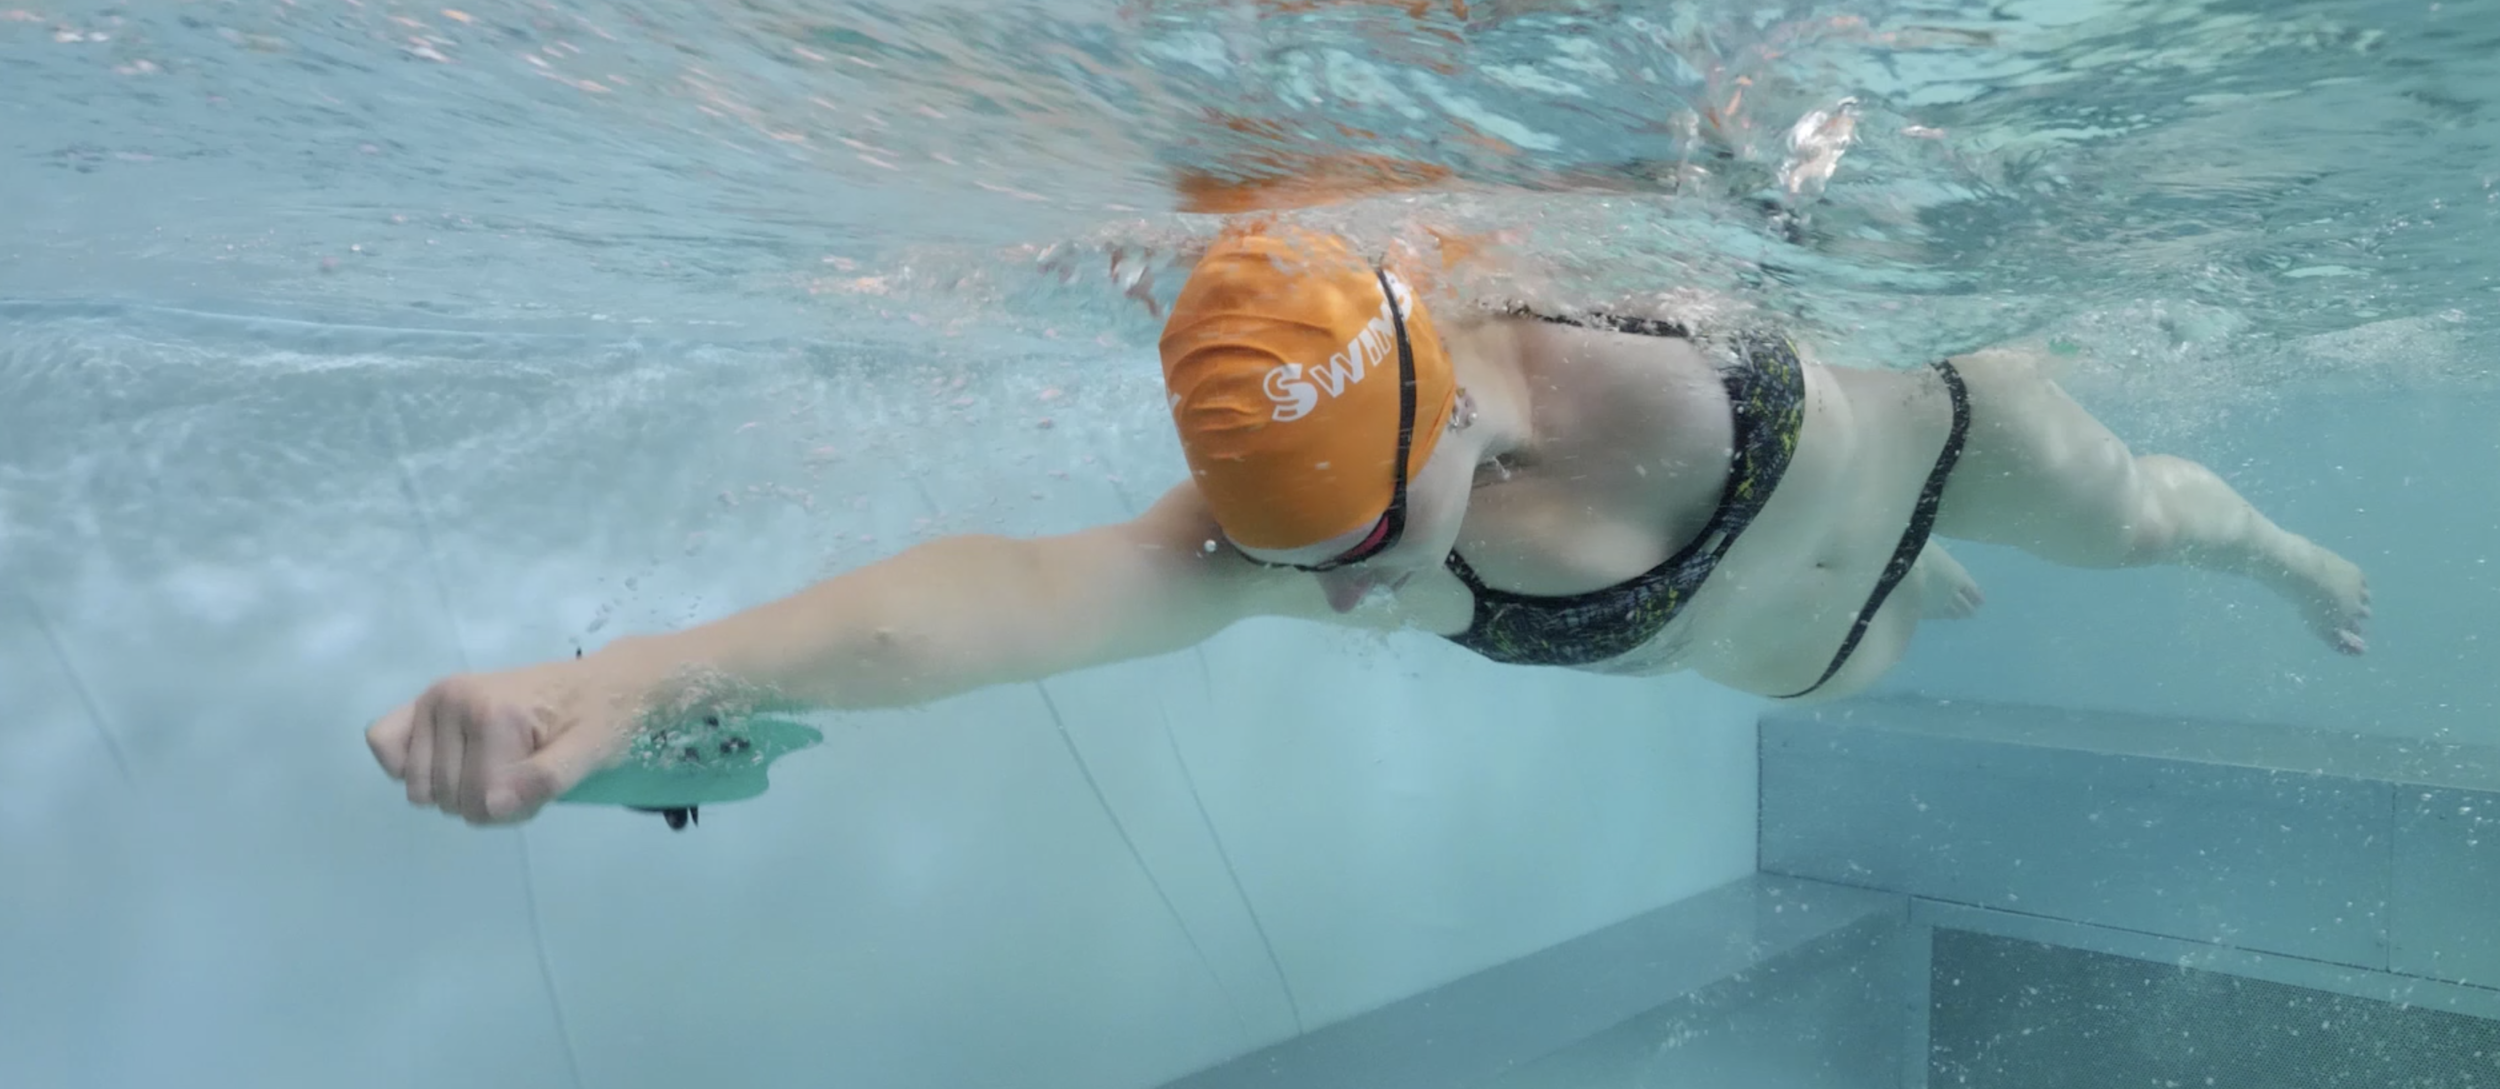
Paddlhead drill is the perfect drill to use to help you learn proper head position in freestyle. For beginners you’re going to start the drill WITHOUT taking a breath. No, I’m not asking you to hold your breath and swim until you pass out (although that might be a fun contest…). I mean when you’re first starting this drill, take 6-8 strokes - or however many strokes you can take without needing a breath - then stop when you need air. When doing this you want to focus on keeping your head in proper position. What’s that, you’re asking? With the paddle on the crown of your head, look straight down at the bottom of the pool. Make sure you’re not cheating here and pushing your neck downward while doing this drill, as that will more often than not keep the paddle from falling off, and will also take you out of proper head position.

SwimBox Swimming Lessons SwimBox Swim Coach Northern Virginia SwimBox Swim Team SwimBox Swim School

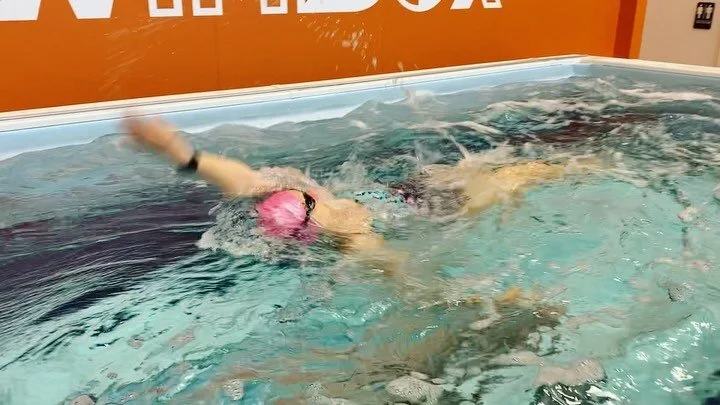
In the image above you can see the exact placement of the paddle that we’re looking for. The paddle should be placed right at the hairline and above the forehead. If you place the paddle directly on your forehead you’ll be able to cheat the whole drill and won’t get any feedback from the drill itself.

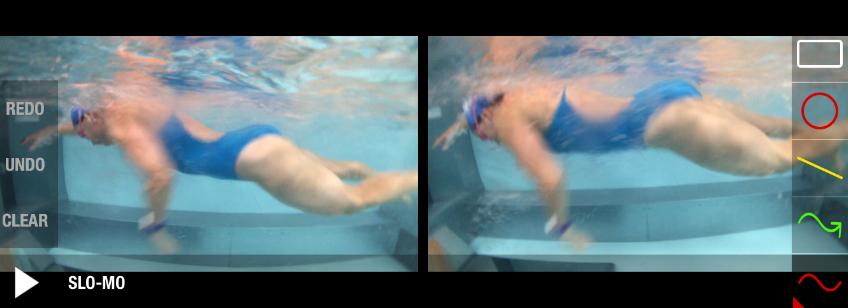
After you’re comfortable with your head position and can swim confidently without the paddle falling off, it’s time to add in the breath. Now, this is where things get tricky and sometimes downright discouraging. Be patient! This is the hardest part to have the paddle stay on. When you go to take your breath, focus on keeping your head low to the surface of the water and make sure your chin is pointing slightly down towards your collarbone. If you lift your head up at all, or move out of proper head position, the paddle will fall off when you go to breathe. Don’t try to do this too fast and get frustrated. I tell you this with 100% honesty, we’ve never had a client take a breath for the first time doing this drill and not have the paddle fall off (not even me). This movement takes time and patience to get right, you just have to keep at it.

SwimBox Swimming Lessons SwimBox Swim Coach Northern Virginia SwimBox Swim Team SwimBox Swim School

When taking your breath, try using your eyes to make the movement and have your head follow. It sounds weird, I know, but your head will follow the path that you make with your eyes without having to completely focus on solely moving your head. You want to look down in your eye sockets and try to look about 4 feet behind you. Another cue is to try to look down towards your armpit. Focus on these things when working on adding in the breath, as this is what will help you keep your head low to the water and prevent the paddle from falling off.

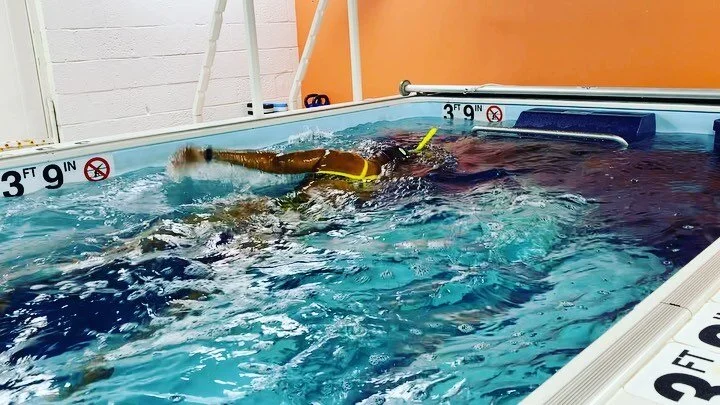
For detailed instructions on this drill before adding it to your next swim make sure to check out our video! You’ll be able to see how the paddle stays in place when I go to take a breath and how low you want your head to be in the water.

Giving Paddles a New Look

Learning how to properly set your catch might be one of the smallest details with the largest impact for your freestyle. Fun fact: I didn’t learn how to properly set my catch until about 2 years ago, and I’ve been swimming for twenty-four years…yeesh, my bad. The hardest thing for me was that I didn’t even know the feeling that I was looking for during my catch, so I never knew I wasn’t making this movement correctly. To this day I still work on this 2-3 times a week with different drills to help me better understand what I need to be doing. My favorite drill right now to focus on finding the right feeling for my catch is Paddles in Hands.

Instead of using your hand paddles they way they were meant to be worn, this drill has you simply hold them in your hands while wrapping your fingers and thumbs around them to hold them in place.

SwimBox Swimming Lessons Falls Church SwimBox Tysons SwimBox Arlington SwimBox Swim Lessons Alexandria SwimBox

Using the paddles this way forces you to focus on creating your paddle, as well as actually feel the resistance of the water against your forearms. Because of the paddles, this drill makes you have to set your paddle with your hand AND your forearm. This can be a tricky movement to understand, but the more surface area you have pushing against the water, the more you’ll be able to propel yourself forward.

This drill is also great to help you learn to set your catch early. If you set your catch late during Paddles in Hands, you’ll definitely feel the difference. A late catch during this drill will give the feeling of pushing down in the water, which is not what we want. You want to have the feeling of pushing backwards. A downward push will not help to move you forward in the water, and will actually throw you out of streamline and off balance.

SwimBox Swimming Lessons Falls Church SwimBox Vienna Swim Lessons SwimBox Arlington Swim Lessons SwimBox Alexandria

The image above is a great shot of both a late catch and a properly timed catch. The left shows the late catch, which you can see is set when the arm is almost perpendicular to the body. When you set your catch this late, your arm drifts downward and loses all of the potential propulsion you would have if you’d set your catch when your arm is closer to parallel to your body. The right shows good timing of the catch. You can see the slight bend in the wrist, indicating the beginning of the catch before we move into the pull phase. By setting this early, when your arm is closer to the surface of the water, you’re able to push backwards against much more water than you would if you set your catch later.

It might not look like a huge difference, but having a good catch means you’re pushing back against more water. This leads to stronger pulls, fewer strokes, and an all over more efficient stroke. A late catch? That leads to having less water to push back against, more strokes, and will end up tiring you out more quickly because you’ll be stroking more and pulling less, causing you to expend more energy to move through the water more slowly.

SwimBox Swimming Lessons Falls Church SwimBox Vienna Swim Lessons SwimBox Arlington Swim Lessons SwimBox Alexandria

As I’ve said before, swimming is a sport of centimeters. So even though this drill is working to fix what looks like a very slight difference in movement, it will pay off ten-fold once you get the hang of it.

Why Bananas Don't Belong in the Pool

“Swimming is a sport of centimeters.” This is something my favorite swim coach likes to tell me over and over again, especially when I’m having trouble making a small adjustment to my stroke. This might seem like a depressing thing to focus on, but it’s really not. Think of the Olympics and the famous finish Michael Phelps had when he out-touched Milorad Cavic by only one one-hundredth of a second to win gold. One one-hundredth of a second. It takes ten times that long to blink to put things into perspective.

The small movements you work to correct over and over again, that sometimes make you want to pull your hair out in frustration, are the movements that will put you ahead that one one-hundredth of a second to beat out your competition. And in this case, the movement I want to talk about is keeping your ribs down and closed while you swim. What does that mean? The best way to understand it is to first think of the opposite, what you look like when you swim with your ribs open. Think of when you arch your back, and how it turns your torso into a "U" shape, or - and this one's my favorite - a banana in the water. Swimming like a banana through the water clearly would not be beneficial for your efficiency and power. This body position takes you out of streamline and, unlike a banana, causes your hips and legs to sink downward toward the bottom of the pool. Swimming with your hips and legs not at the surface of the water means you're causing unnecessary drag that you have to fight hard against to propel yourself forward through the water.

SwimBox Swimming Lessons SwimBox Online Course SwimBox Swim Lessons SwimBox Triathlon Swim Team SwimBox Vienna SwimBox Tysons

The position you want needs to be driven from your ribs, and is, in actuality, a very small movement. When people tell you to arch your back most people create an extreme exaggeration, forming that “U” shape with their bodies. Here, you want a slight crunch inwards, driven from your ribs, which will result in a flat back. Think of it like the position you make when you exhale. When you blow your air out, your ribs go down and move inwards. Not the exact opposite of an arched back, you don’t want a hunchback either. You want to straighten our your back with this downward movement of your ribs in order to prevent swimming like a banana.

SwimBox Swimming Lessons Falls Church SwimBox Swim Coach SwimBox Swim Lessons SwimBox Swim Team SwimBox Fairfax SwimBox Arlington

What does this position do? It brings your hips and legs up to the surface of the water, AND helps to tilt your head into proper position at the same time. Try both of these movements standing up on land before trying them out in the pool. In the beginning, make them as exaggerated as you can. To make your banana, take in a really big breath and hold it. Now watch as your body turns into that “U” shape/banana. To feel the opposite, the position we’re looking for, exhale that really big breath and you’ll feel your body straighten back out, as well as the weight of your body falling back onto your heels. This will show you the extreme differences and help you find what we’re looking for in the water.

I know this probably sounds weird, but this minor change to your posture is one of the centimeters that’s going to help you get that much closer to your goal times. It’s going to improve your streamline, power, and efficiency by allowing you to move through the water with less effort and more smoothly than before. If you want to work on this more intensely make sure to take a look at our Foundational Breathing Method online course!